
Why and how to sync a KeePass database to the cloud
/
Lately a lot of us have been working from home, and as a remote-first company, the Daycast team can offer some lessons-learned in this area. One common issue is how to keep password data current, secure, and available in multiple locations. We can help. Our first tip is to use the popular KeePass password manager—it’s free! Next, sync your password database to the cloud. This allows you to keep multiple copies of it—on more than one of your own devices, for example, or on multiple team members’ devices—while still ensuring that it stays up to date. If you change your email password, for instance, do you then have to manually update every copy of your KeePass database? Not if you sync it to the cloud, you don’t.
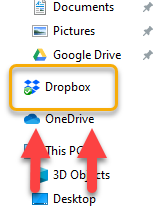
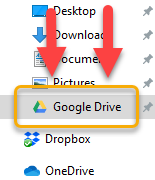
Using Dropbox, Google Drive, or OneDrive, you can merge changes made in any copy of your KeePass database to all the other copies. Here’s how.
Select your cloud service
Click to expand the initial steps to take to start syncing your KeePass database to the cloud.
Follow the KeePass steps
Now follow the steps below to complete your syncing setup.
- If you don’t already have it, download KeePass from https://keepass.info/download.html.
- Run KeePass and create a new database. Use the path from the specific cloud provider above for the file location. When asked to create a Master Key, don’t just create a password. Also check the “Show expert options” box, then check the “Key file/provider” box, click “Create” and follow the instructions to create a Key file. Save it somewhere locally (not in the cloud). This key file should never be stored alongside your database file, and ideally should never be transferred using third-party services. If the key file needs to be shared with a team of people, it’s best to share it in person.
- The next step is to create a trigger by going to Tools, then Triggers and clicking “Add.”
- Give your trigger a name (we chose “Cloud Sync” for this example) and make sure it is enabled.
- Click “Next” and then “Add.” Select “Saving database file” from the dropdown. Make sure that "File/URL - Comparison" is set to “Equals.” In the second field, enter the path to where your file will be stored in the cloud. You can find the path for your cloud service in its respective section above. Note: make sure the path is enclosed in quotes. Click “OK.”
- Click “Next” and then “Add.” Select “File exists” from the dropdown. Re-enter the file path to your database. Note: make sure the path is enclosed in quotes. Click “OK.”
- Click “Next” and then “Add.” Choose “Synchronize active database with a file/URL” from the dropdown. Re-enter the file path to your database. Note: make sure the path is enclosed in quotes. Click “OK” and then “Finish.”
Your KeePass database is now syncing
That’s it. You’re done. Any changes made to any copy of the KeePass database you just synced to your chosen cloud service will trigger an automatic update of the changes to every other copy. Questions? Let us know in the comments.
