
MonitorPi: How to use a Raspberry Pi to monitor hardware
/
In a modern cloud-computing world where hardware and the user are often separated, it can be difficult to monitor the physical situation in a datacenter or networking closet. Do you know if anyone has opened the rack since you were last there? Is the cooling system working as expected? These questions are important for anyone who manages computer hardware to answer. But how?
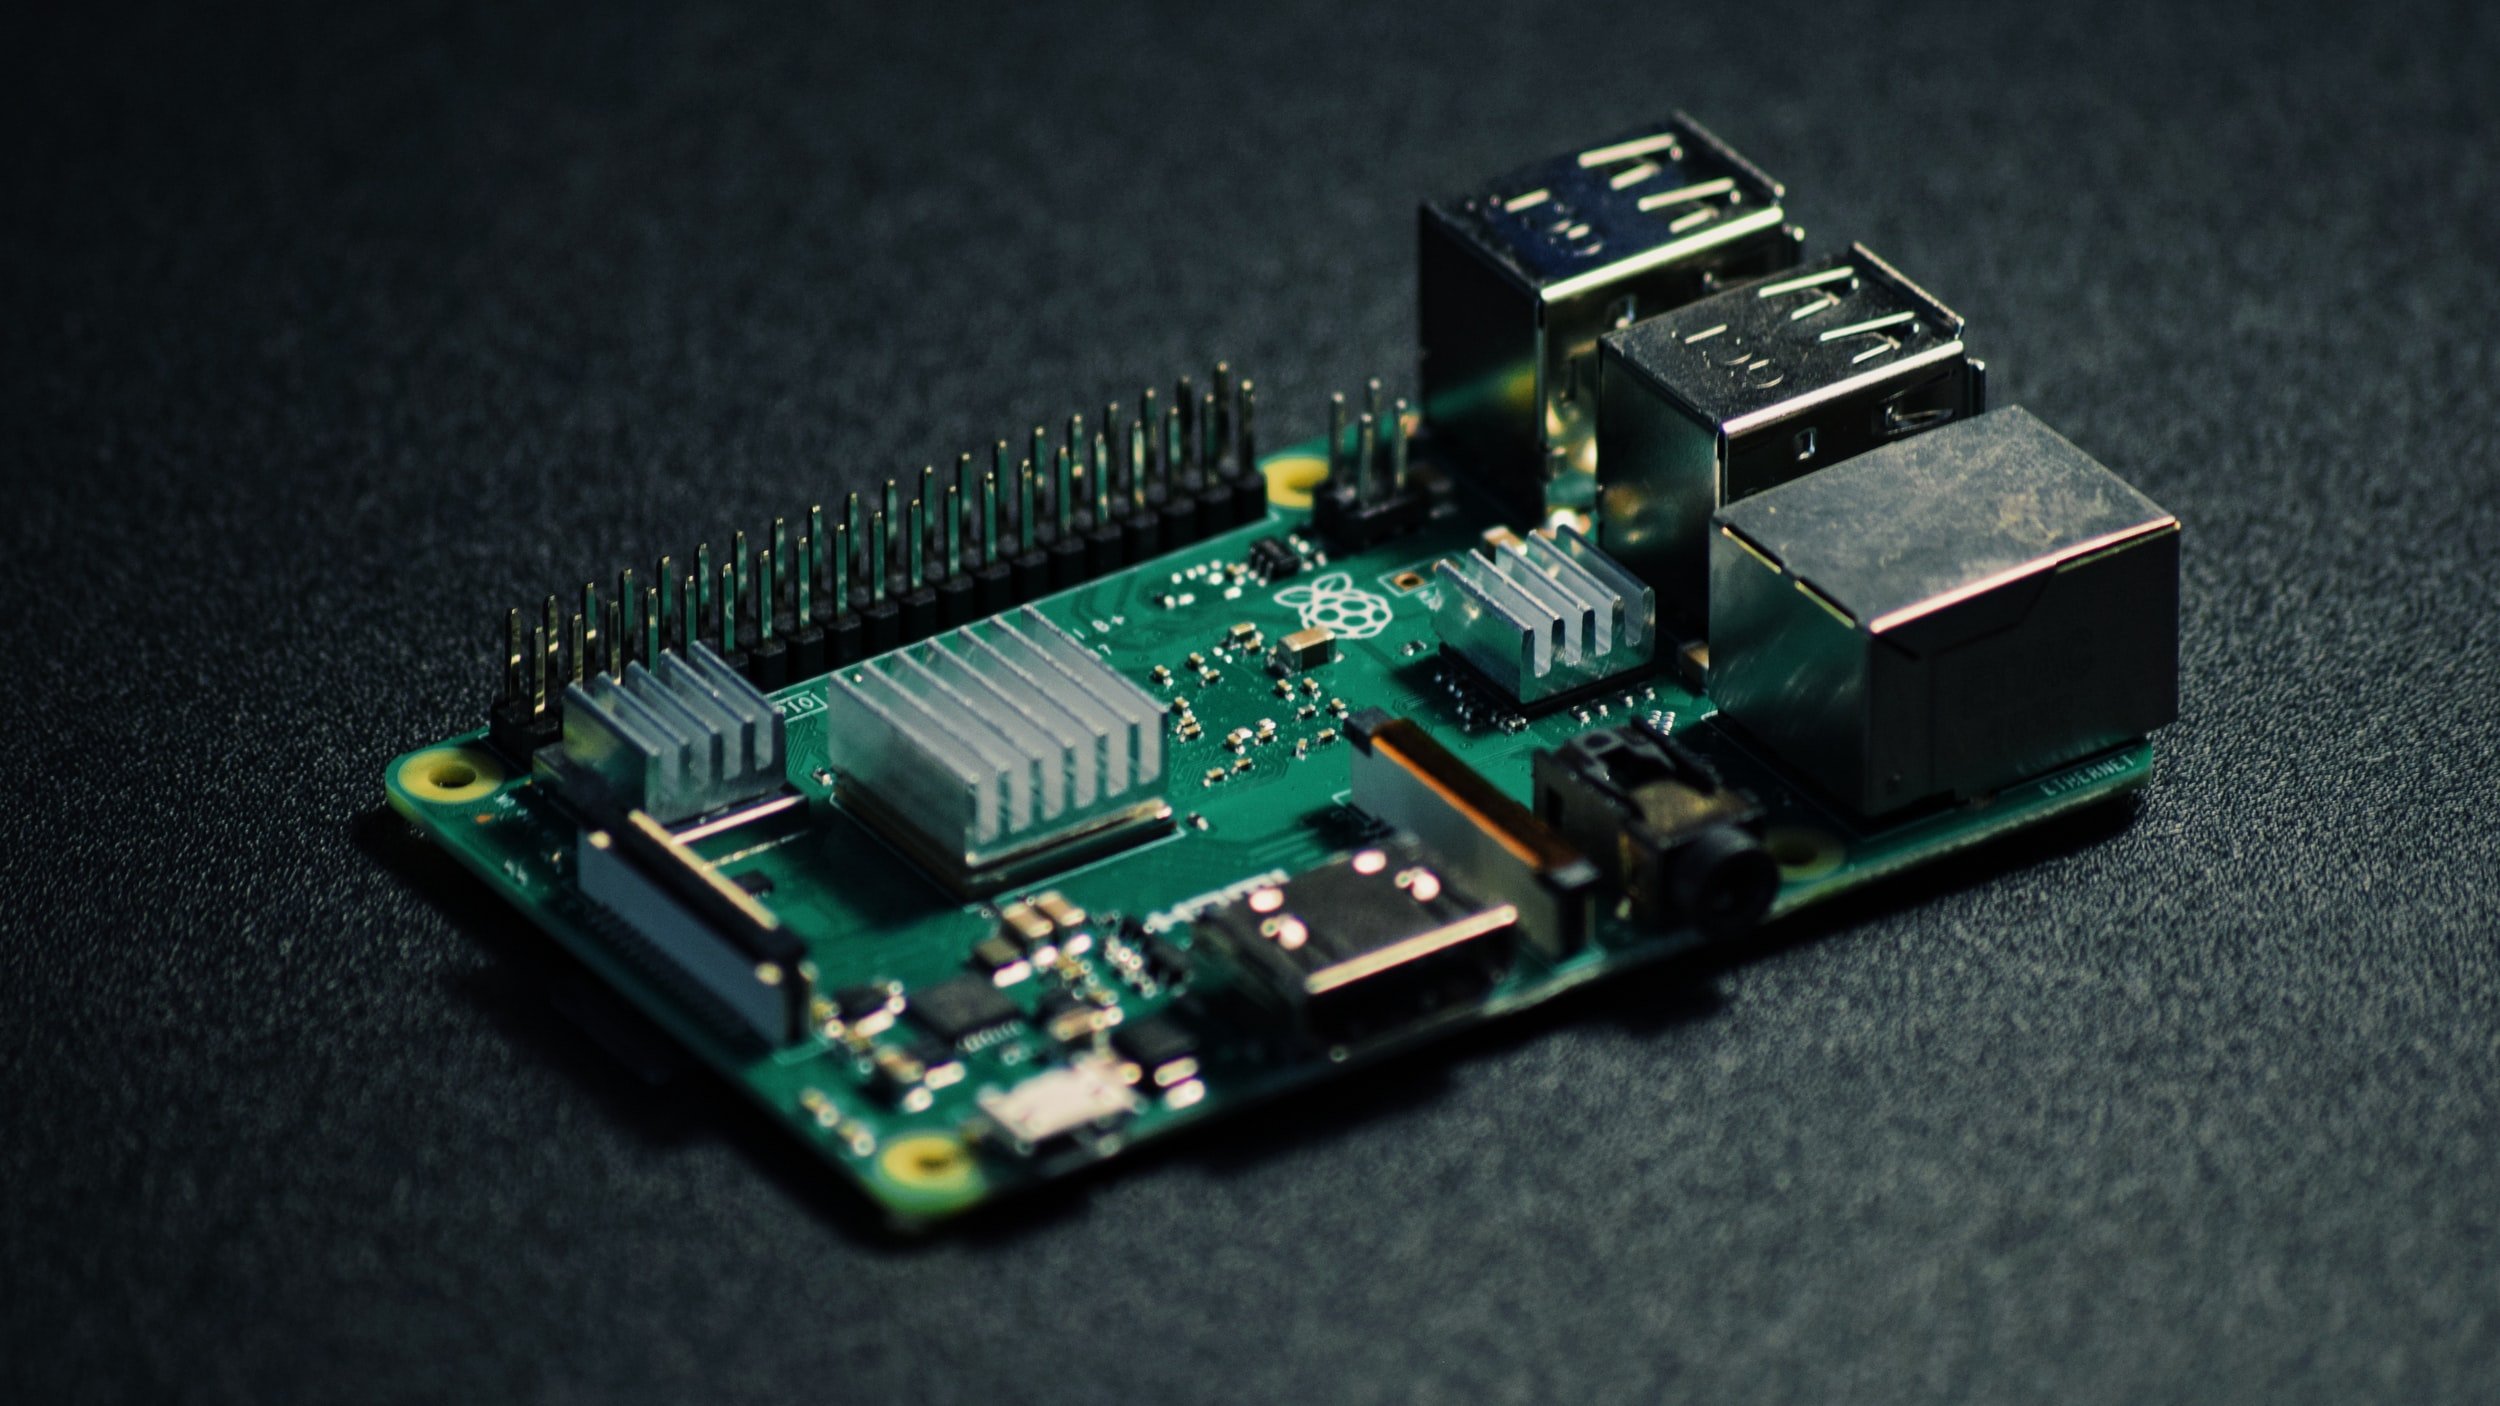
You can buy an expensive piece of enterprise-grade hardware, but a more cost-effective solution is relatively simple. The heart of this solution is a Raspberry Pi running Raspberry Pi OS, a Debian Linux derivative. The Pi communicates with a temperature sensor and a magnetic contact sensor. These different hardware components are recorded by monitoring software where they can be easily viewed. The number and variety of sensors is limited only by your imagination.
What you’ll need to build your MonitorPi:
(Required) Raspberry Pi: Amazon.com: Raspberry Pi 3 B+ Bare Kit with Heatsinks and Power Supply: Computers & Accessories
(Required) Raspberry Pi SD Card: Amazon.com: SAMSUNG (MB-ME32GA/AM) 32GB 95MB/s (U1) microSDHC EVO Select Memory Card with Full-Size Adapter: Computers & Accessories
(Required for temperature monitoring) Temperature Probe: Amazon.com: ICQUANZX 2pcs DS18B20 Temperature Sensor Module Kit with Waterproof Stainless Steel Probe for Raspberry Pi
(Required for access monitoring) Magnetic Contact Switch: Amazon.com: 3X Magnetic Reed Switch Normally Open
(Recommended for beginners) Breakout Board: Amazon.com: RPi GPIO Status LED & Terminal Block Breakout Board HAT
(Optional but helpful) Double-sided Tape: Amazon.com: Scotch-Mount Indoor Double-Sided Mounting Tape
(Optional but helpful) Wire for extending the contact sensors: Electrical Wire 16 AWG 16 Gauge Silicone Wire
(Optional but helpful) Redundant Ethernet for Raspberry Pi: Amazon.com: TP-Link USB to Ethernet Adapter, Foldable USB 3.0 to 10/100/1000 Gigabit Ethernet LAN Network Adapter
How to set up your Raspberry Pi
The Raspberry Pi is the brain of the operation. It interfaces between the hardware sensors and the Zabbix server. Here’s how to set it up:
Flash the Raspberry Pi with Raspberry Pi OS. Refer to this guide for a step-by-step tutorial created by the manufacturer.
BEFORE YOU BOOT THE DEVICE, add a file named ssh in the system-boot directory of the file system. This will boot the device with SSH enabled. If you boot the device and then add this file, SSH will not start. The file must be in place before the first boot.
Boot the device, and search your network for the new IP. SSH into the device with the username and password of pi/raspberry.
Run the following commands to set everything up:
sudo apt install pythonsudo apt update && sudo apt upgradesudo apt install pip3pip3 install adafruit-circuitpython-dhtsudo apt-get install libgpiod2
How to set up your hardware

The wiring schematic for the MonitorPi.
Install the Pi breakout hat
Before we can wire the other parts of the project to the Raspberry Pi, we need to install the breakout hat. The hat spreads the 40 GPIO pins out to occupy the whole top of the Pi. This makes wiring a lot easier. Install it by carefully sliding the hat down over the GPIO pins. Attach the included hardware to secure the whole package. (If you don’t want to work with the hat on top, wiring straight to the GPIO pins is a difficult but not impossible option.)
Wire the contact sensors
The wiring for the contact sensor is simple. Wire each lead to the correct pin on the breakout board. The white wire from the sensor is wired into a ground GPIO pin. The black wire is connected to a numbered GPIO pin. The second sensor is wired in the same way with the black wire in the next consecutive data pin and the white wire going to any open ground. As long as there are more pins, more sensors can always be connected. Wire the first pin to the sensor at the front door of the rack, wire the second pin to the back door. This makes sure the scripts have proper context for the sensor location.
Plug in the temperature sensors
The temperature sensor uses the DS18B20 temperature and humidity sensor. This sensor needs a resistor to pull up the voltage. The sensor communicates using the 1wire protocol. Since this protocol uses a bus, we can simply plug as many sensors as we need into the resistor that is provided with the sensors, and the PI will differentiate between each as it reads the data.
Configure the software
After the sensor is wired, enable the 1wire protocol with the following commands:
sudo modprobe w1-gpiosudo modprobe w1-therm
Next, download the package of scripts that you’ll use to record and upload the values collected from the temperature sensors.
git clone https://github.com/CSNW/MonitorPi.gitThis script is a library that contains code to check the temperature and status of the door sensor. Among others, there are three important scripts downloaded:
scripts/monitorpi.py — This script is a generic collection of functions used to collect data from sensors.
scripts/door.py — When executed, this python script gives the status of the magnetic contact sensors connected to the system.
scripts/temperature.py — When executed, this script returns the temperature readings for each temperature sensor connected to the system.
Before you run the scripts, create a configuration file so they can be successfully located. Most importantly, the MAC addresses for the temperature sensors must be recorded. You can access the sensor addresses at /sys/bus/w1/devices/ using this command:
ls /sys/bus/w1/devices/The sensor addresses should look something like the following string: 28-00000000b9bf. Once the 1wire protocol has been enabled, sensor data can be accessed at /sys/bus/w1/devices/.
ls /sys/bus/w1/devices/Now that you have your sensor addresses, create a file called config.txt
cd monitorpisudo nano config.txtPlace the address for your temperature sensors in this file with no extra spaces. If you have multiple sensors, add the address for each on a new line. When you are done editing the file, hit CTRL+S to save the file, and CTRL+X to exit the editor.
Once you have created the config file config.txt in the same directory as the python script, you can run it with the following command.
python3 scripts/temperature.py The output should look something like this: ["79.5866", "79.1366"]. Make sure to also test the contact sensors.
python3 scripts/door.pyAt this stage, both the temperature and contact sensors are successfully set up! The next step is to set up a framework to report these local values to remote admins.
Set up Zabbix agent
There are a number of ways you could set up monitoring. Here is how you would set it up with the Zabbix agent.
Install the Zabbix agent and edit the Zabbix agent config file at /etc/zabbix/zabbix_agentd.conf. Add a user parameter for both the temperature sensor and the door sensor at the bottom of the file. The path of the script must be edited to match your environment.
UserParameter=temp.pull[*], python3 /home/pi/temp.pyUserParameter=door.status[*], python3 /home/pi/door.py
Give the Zabbix agent the permissions to access the GPIO pins.
sudo usermod -G GPIO -a zabbixsudo service zabbix-agent restart
You should now be able to access the temp.pull[] and door.status[] variables from the Zabbix server.
Monitor your hardware
Now that you’ve set up your Raspberry Pi, set up your hardware, and configured your software, you’re ready to use your new MonitorPi to monitor your datacenter or networking closet from a distance… without dropping major dollars. Nice job!
Watch Gavin’s talk, presented at LinuxFest Northwest 2022, on the MonitorPi system.
LinuxFest Northwest 2022. MonitorPi: An Introduction to Open-Source Hardware Monitoring


The rock: It can’t possibly matter if I do [annoying task] today. Aren’t we temporary? Brief ripples on the river of time? Why bother? The hard place: I feel bad about myself when I fail to do simple, if dreaded tasks. There is a path between these two, and an app called Finch helps me find it.